#1 Lace It Up!
#2 Dress It Up!
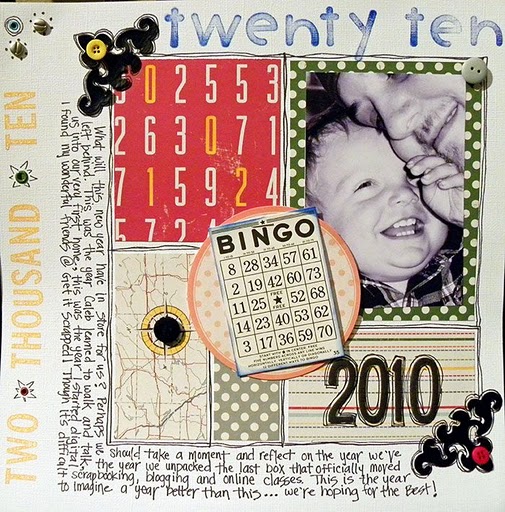
As a cute corner accent, or as punctuation, or even as a little bit of background texture, eyelets can really dress up your pages. They offer a way to bring color, interest, texture and function to your layouts, depending on how they're used. And your multi-purpose punch tools allow you the power to place these little beauties wherever you like! In "2010" I used eyelets both as punctuation to divide up my title and as a small accent by clustering them in the corner of my page.
Your multi-purpose punch tool can also help you to bring contrast and dimension to your layouts by giving you the ability to break up your whitespace, with the contrast of the negative space created by punching. You could try creating a fun random pattern or following a specific line, as I've done above in my lo "Oh Boy".
#4 Tie It Up!
The best way to create a knot or a bow in the middle of your page is with your multi-purpose punch tools. Not only does it help to have a punch that can reach anywhere, but using a punch can also give your bow a more realistic look and a sense of purpose, by securing to the page. It eliminates the feeling of a floating element and to really top off the look you could add eyelets for a bit if style. In "My Pregnancy Timeline" I used my multi-purpose punch to secure my knot in the center of the page.
#5 Hang It Up!
I like to use my multi-purpose punch as a way of hanging things like banners, beads, titles, photos and more along my pages. I do so by setting two eyelets in my page: one at the beginning of my line and the other at the end. I then take my jute, twine, or whatever other fiber I've chosen to hang my elements from and thread the raw ends through the eyelet holes and tape them off on the back. Now I have a secure line to hang my elements from and the eyelets give it a nice finished look. In "Is It Spring Yet?", this is the technique I used to string my floral banner across the page.















0 comments:
Post a Comment