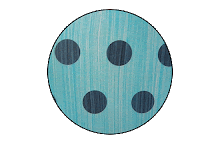
When I first started digi scrapping a little over a year ago the thing that really impressed me about it, was the ability to customize my digital supplies, including re-coloring them, at the touch of a button. Wouldn't it be great if you could do this with your paper supplies!? Well, what's stopping you!? Recoloring paper can be a great way to customize your supplies, update them or just to have a little bit of fun! Check out these 7 techniques, which offer different ways for recoloring your paper.
NOTE: While its easiest to start with a predominently white or light colored background, some of these techniques with higher opacity ratings can accent or even re-color darker backgrounds.

PAINT
Saturation * * * *
Texture * * * *
Even Coverage * * *
Ease * * *
Opacity * * * *
Dry Time * * *
All you need is some acrylic paint and a paint brush to get this effect. The more coats you apply the less of the original background you will see and the more saturated the paper will become. This technique can work with lighter and darker backgrounds and is best suited for medium to heavyweight papers.

ALCOHOL INK
Saturation * * * * *
Texture *
Even Coverage * * * *
Ease * * * *
Opacity * * *
Dry Time *
In order to get this effect you will need alcohol inks, blending solution and an applicator. This method is highly saturating and creates rich even colors. It is very fast drying and therefore suited for most weights as long as you have a paper towel or second sheet of paper underneath to soak up any inks that leak through.

GLIMMER MIST
Saturation * * *
Texture * *
Even Coverage *
Ease * * * *
Opacity * * *
Dry Time * *
Using glimmer mists can bring rich colors, a fun texture and a little bit of sparkle to your papers. The more applications that are applied the more saturated the paper becomes, and the richer and more even the color will be. While the color is fairly permanent (except when watered down or mixed with water-based paints), the glittery finish does have a tendency to wear off with time.

CHALK
Saturation *
Texture * *
Even Coverage * * *
Ease * * *
Opacity *
Dry Time NA
To get this look, use chalk and a dauber to blend the color into your paper. This will give a soft subtle color. This finish is typically not very permanent, but can be if you follow up with a clear coat or fixative after application.
GLAZE
Saturation * *
Texture * * * * *
Even Coverage * *
Ease * *
Opacity * * *
Dry Time * * * * *
Tinted glaze can be created a number of different ways, each one yielding slightly different results. The above glaze was made by mixing a small amount of acrylic paint with decoupage. For a glossier look and more even coverage you can add a small amount of paint to a glaze medium, or you can purchase a pre-colored glaze medium. Of all the techniques this one will take the longest to dry.

DYE
Saturation * * * *
Texture *
Even Coverage * * * *
Ease * * *
Opacity *
Dry Time * * * *
I have come across two techniques for applying dyes to paper, one of which is to brush the dye across the paper like watercolors, the second is to submerge it in a pan of dye. I personally prefer the latter, as there is less pilling of the paper and it provides for a more even color.
WHITEWASH
Saturation * * *
Texture * * *
Even Coverage * *
Ease *
Opacity * * * *
Dry Time * * *
Whitewashing can bring a hint of color, while adding a bit of distessing. You can get this look by adding a thin layer of gesso to the paper and letting it dry. Then apply a watered down acrylic ofer the top and then brushing it away with a paper towel. This effect will mute the background pattern and should be reserved for medium to heavyweight papers.
Can't wait to see all of your supply makeovers...there's still time to join the fun with Get It Scrapped's Monthly Blog Challenge! Visit the Get Blogging Forum here.


0 comments:
Post a Comment