
#1 USE YOUR DIGITAL PAPERS
Printing own your fabric is easy as one...two...three...when converting your favorite digi papers to fabric! So give it a try:

Digital Paper from ErinINK's Pamper Yourself Kit
TIP: Simply drag your favorite digital papers onto a blank 8.5 X 11 doc, resize to your liking and print...who knew it could be so simple!

#2 USE YOUR CUSTOM SHAPES
Whether the preset custom shapes that came with your version of PS,or after market custom shapes that you've added to your arsenal, they will work great for designing your own custom fabric prints!

Pattern Created with PSE7 Custom Shape: Diamonds and Rub-on Action by Atomic Cupcake
TIP: To make things even more simple...create a 2x2 swatch of your fabric, define your swatch as a pattern and then use the "pattern adjustment layer" to fill your full sized document with your fabric print. Double click on the icon on your pattern's adjustment layer to reposition and resize your pattern.

#3 USE YOUR PHOTOSHOP BRUSHES
Comparable to digital stamps, Photoshop Brushes will make designing your own fabric prints a breeze! Just choose a brush you like, load it and stamp away!

TIP: Use the Brush Menu Bar to alter the size, opacity and angle of your brushes and remember to place your brushes on separate layers so they can be removed or repositioned easily.

#4 USE YOUR DIGITAL OVERLAYS AND TEXTURES
There are so many great textures and overlays out there that will make creating your own fabric a cinch...find a pattern you like and pair it with the color of your choice for a fabulous custom design!

Tip: Try out all of your different blending modes when merging your overlays and color filled layers...you'd be surprised what you'll come up!

#5 USE YOUR DIGITAL ELEMENTS
While stickers, doodles, word art and other "flat" elements tend to work best...really the sky is the limit!Soon you're only problem, when designing you very own fabric, will be deciding which elements to use!

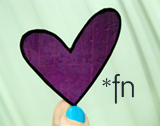
Digital Word Art from Luv U 4ever by Emily Powers
Tip: Once you've dragged your first digital element onto your working document, just hold down the ALT key while clicking on your element to generate copies. Then position your copies to create your overall pattern.

Now you're ready to print your designs onto 8.5 x 11 Printable Fabric Sheets! Check out the variety of fabrics offered at Color Plus Fabrics. With 22 different fabrics and weights to choose from I'm sure you'll find one thats perfect for you next batch of home printed fabric!
Looking to print your fabric designs by the yard for larger personal craft projects...give Spoonflower a look. Here you can import designs and have them printed on a variety of fabrics, cut to order!
And finally here are a few fun tutorials for you to put your new fabric designs into action!
Fabric Magnets by Amy Kingsford
Fabric Flower Brooch by The Primrose Corner
Frayed Flower Card by Ashley Cannon
Fabric Beaded Necklace by Pretty Ditty
Can't wait to see all of the fun fabric creations you all come up with! Happy Crafting!


1 comments:
Sweet idea! I have never even thought of trying something like that. I always wondered how someone could come up with super cute custom fabric on Etsy! Thanks for sharing. :)
Post a Comment