Showing posts with label Get It Blogged. Show all posts

Monday, March 29, 2010

Monday Makeover: Makeover Your Style!

For my final Makeover Monday challenge of March, I have challenged my fellow GISistas--as I hear they are now being called ;)-- to Makeover their scrapbooking style!  Now the objective of this challenge is not replace your own FABULOUS style with another, but to practice accentuating it!  And here are few ideas how to go about it! 

To illustrate the style differences in the los below, I have chosen to work with the same background paper, by Die Cut With a View, and the same inspirational sketch, Sketch #39 by Debbie Hodge.

#1. TRY INCORPORATING A STYLE TOTALLY DIFFERENT FROM YOUR OWN

Inspired by "Making an Art Journalish Layout" by Dina Wakley

There are so many great styles out there to choose from, try channeling a different style and chances are you'll come up with an awesome hybrid of of the two styles!

#2. USE A PRODUCT OR SUPPLY IN A NEW AND CREATIVE WAY

Inspired by "Designer Project by Paula" by Paula Gilarde
and "Embellishing with Alphas" by Debbie Hodge

Whether it be using a doily as a frame, or an alpha as an embellishment, or even your digital supplies on your paper los, every supply has multiple uses, so get creative and see the difference it makes!

#3. TRY OUT A NEW TECHNIQUE

Inspired by techniques learned in Oodles of Doodles with
Michelle Houghton and Scrapbooking with Fabric with Tania Willis

Fun techniques can really give your style a boost, so pick a technique you'd like to learn and take a class or find an online tutorial!  I think you'll like the process of learning something new and the effect new techniques will have on your current style!

Thanks for joining me this month for the Get It Scrapped Blog Challenge and my Monday Makeovers...I have enjoyed reading all of your blogs and being inspired by your creativity! 

Sunday, March 21, 2010

Makeover Monday: Makeover Your Supplies

7 Ways to Re-Color Your Papers

When I first started digi scrapping a little over a year ago the thing that really impressed me about it, was the ability to customize my digital supplies, including re-coloring them, at the touch of a button. Wouldn't it be great if you could do this with your paper supplies!? Well, what's stopping you!?  Recoloring paper can be a great way to customize your supplies, update them or just to have a little bit of fun!  Check out these 7 techniques, which offer different ways for recoloring your paper.


NOTE: While its easiest to start with a predominently white or light colored background, some of these techniques with higher opacity ratings can accent or even re-color darker backgrounds.


PAINT
Saturation * * * *
Texture * * * *
Even Coverage * * *
Ease * * *
Opacity * * * *
Dry Time * * *


All you need is some acrylic paint and a paint brush to get this effect.  The more coats you apply the less of the original background you will see and the more saturated the paper will become.  This technique can work with lighter and darker backgrounds and is best suited for medium to heavyweight papers.


ALCOHOL INK
Saturation * * * * *
Texture *
Even Coverage * * * *
Ease * * * *
Opacity * * *
Dry Time *


In order to get this effect you will need alcohol inks, blending solution and an applicator. This method is highly saturating and creates rich even colors.  It is very fast drying and therefore suited for most weights as long as you have a paper towel or second sheet of paper underneath to soak up any inks that leak through.


GLIMMER MIST
Saturation * * *
Texture * *
Even Coverage *
Ease * * * *
Opacity * * *
Dry Time * *


Using glimmer mists can bring rich colors, a fun texture and a little bit of sparkle to your papers. The more applications that are applied the more saturated the paper becomes, and the richer and more even the color will be. While the color is fairly  permanent (except when watered down or mixed with water-based paints), the glittery finish does have a tendency to wear off with time.


CHALK
Saturation *
Texture * *
Even Coverage * * *
Ease * * *
Opacity *
Dry Time NA


To get this look, use chalk and a dauber to blend the color into your paper. This will give a soft subtle color. This finish is typically not very permanent, but can be if you follow up with a clear coat or fixative after application. 

GLAZE
Saturation * *
Texture * * * * *
Even Coverage * *
Ease * *
Opacity * * *
Dry Time * * * * *


Tinted glaze can be created a number of different ways, each one yielding slightly different results.  The above glaze was made by mixing a small amount of acrylic paint with decoupage.  For a glossier look and  more even coverage you can add a small amount of paint to a glaze medium, or you can purchase a pre-colored glaze medium.  Of all the techniques this one will take the longest to dry.


DYE
Saturation * * * *
Texture *
Even Coverage * * * *
Ease * * *
Opacity *
Dry Time * * * *


I have come across two techniques for applying dyes to paper, one of which is to brush the dye across the paper like watercolors, the second is to submerge it in a pan of dye.  I personally prefer the latter, as there is less pilling of the paper and it provides for a more even color.


WHITEWASH
Saturation * * *
Texture * * *
Even Coverage * *
Ease *
Opacity * * * *
Dry Time * * *

Whitewashing can bring a hint of color, while adding a bit of distessing. You can get this look by adding a thin layer of gesso to the paper and letting it dry.  Then apply a watered down acrylic ofer the top and then brushing it away with a paper towel.  This effect will mute the background pattern and should be reserved for medium to heavyweight papers.

Can't wait to see all of your supply makeovers...there's still time to join the fun with Get It Scrapped's Monthly Blog Challenge! Visit the Get Blogging Forum here.

Monday, March 15, 2010

Makeover Monday: Anything Goes!

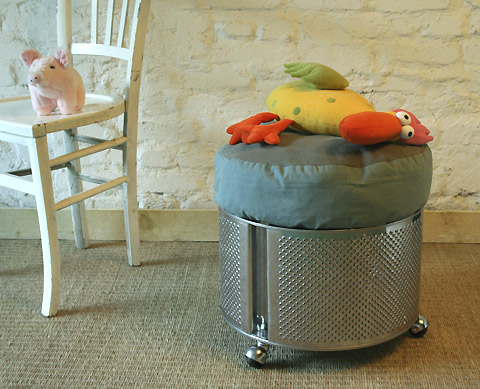
Is it that time again?!  Wow those Mondays just sorda sneak up on ya don't they?!  Well regardless its here--another Monday Makeover Challenge!  I have challenged my fellow GISers to share their ideas, as well as other's, for making over their personal belongings.  Here are five fabulous makeover ideas I'd like to share from some of my favorite magazines, artists and bloggers...I hope you are as inspired by them as I was!  Most of them are accompanied by step-by-step tutorials, so check them out!

1. Button Cuff Bracelet by Kristen Lomino

Photo Source: Craftbits.com


2. S-Bot 2007 by Mad in Crafts


Photo Source: EcoStreet


4. Door Headboard by Country Living


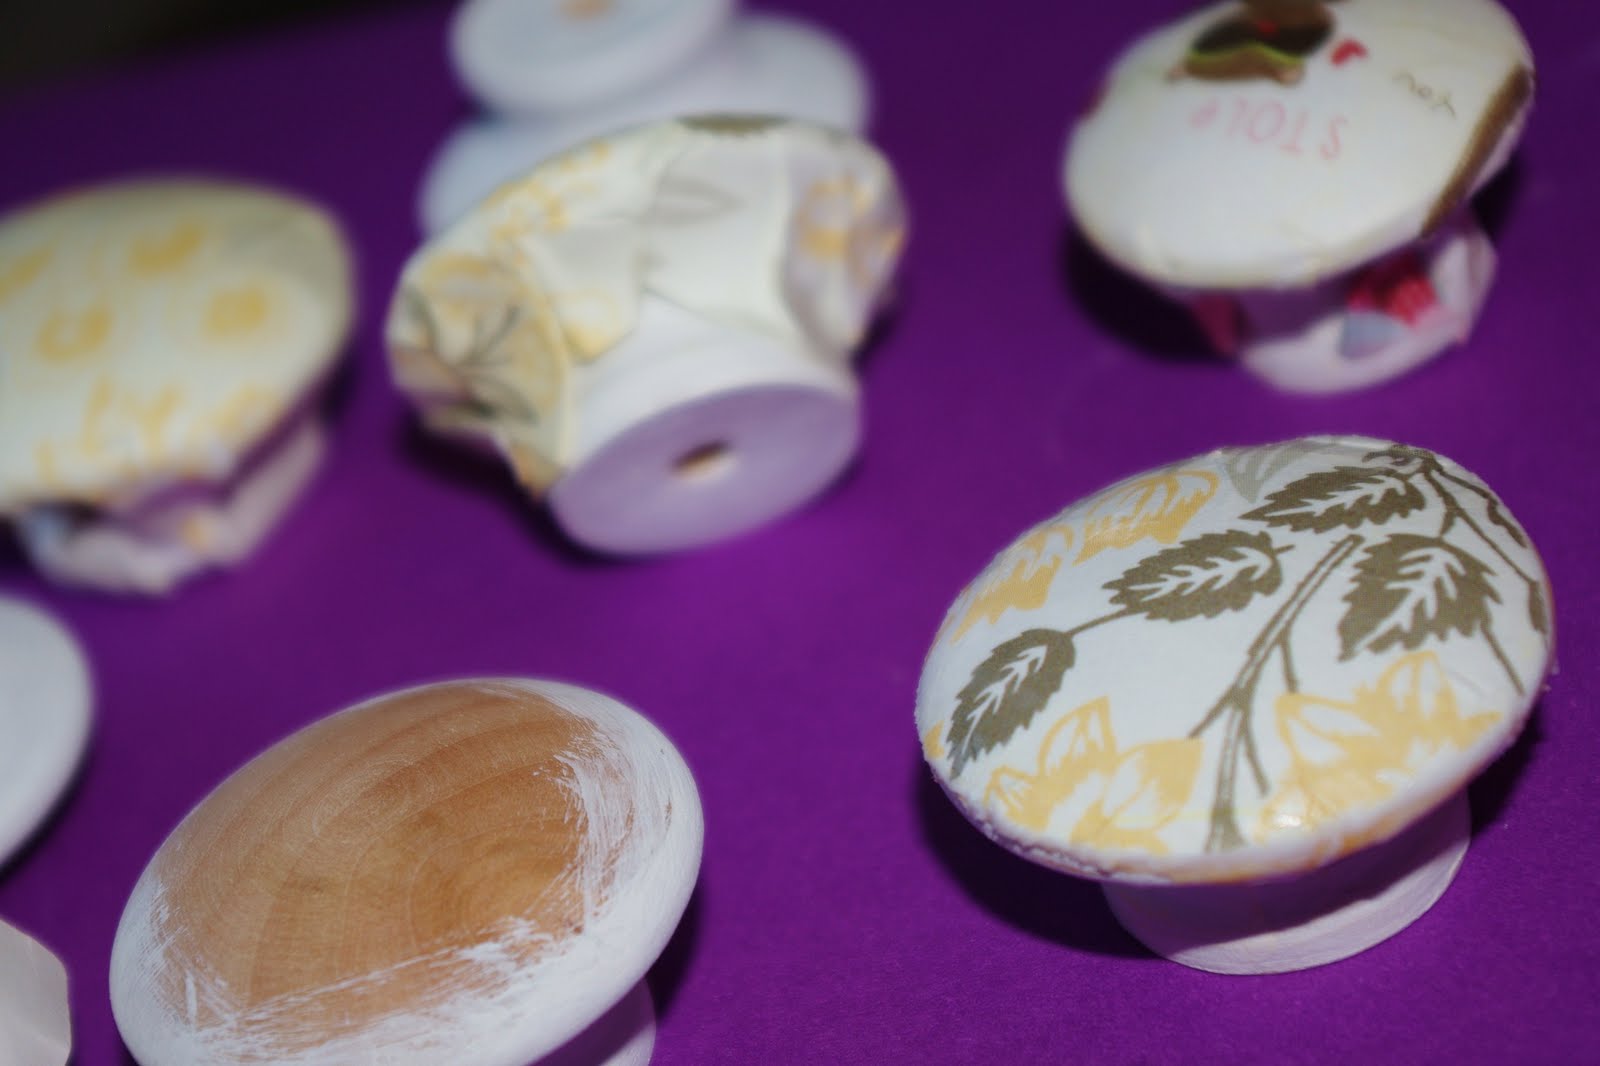
5. Embellished Furniture Knobs by The Rubber Punkin (Emily)

Photo Source: The Rubber Punkin

Isn't it amazing how we can turn what seems like nothing into something beyond special!  Can't wait to see all of your projects and ideas...Have any to share...link me up in the comments...I love a good makeover!

Tuesday, March 9, 2010

Us: Thru the Years

Today's prompt for the Get It Scrapped's month long blog challenge came from Sharyn Tormanen, and she challenged us to flashback and take a look at where were this time throughout the years! 

My life truly began when I married my husband 4 year ago...so this seemed like a natural starting point for me to begin my journey back in time...and as I flipped through the folders of photos on my computer, I began to notice a theme...each year around this time we added something special to our lives...Have a look!

click on the image for a larger view

In 2006 I found the missing piece in my life and we were married on February 24th.

In 2007, we adopted this adorable little puppy and named him Coda...today he weighs 150lbs, but is just as beautiful as the day we first saw him!

In 2008, our first child was born and our lives as a family were just beginning.

In 2009, we built this wonderful addition to our very first home that we had bought months earlier...now this family finally had a place to call home!

In 2010, our baby became a boy, who grows smarter and more talented every day.  And while I miss the days of cradling him in my arms...I am truly looking forward to the days filled with laughter and joy!

While I'm not a person who lives in the past...I do believe in keeping it, for we may never know who we are suppose to become, with out remembering where we started from!

Monday, March 8, 2010

Another Makeover Monday: Creative Organizing

6 Ways to Creatively Organize Your Ribbon!

Thanks for joining me for another week of Makeover Monday, part of Get It Scrapped's month long blogging challenge. Creative organizing is a great way to give your scrap space the makeover it needs, while having a little bit of fun!  Check out these fun suggestions for organizing and storing your ribbon, using everyday household objects and see how a little bit of creative organizing can go a long way!


1. Glass Jars and Canisters are a perfect way to store your small scraps of ribbon.  You may be tempted to throw those smaller pieces out , but that would be a huge mistake!  Instead keep them handy in a small glass jar, so that you can see the variety of colors and patterns you have on hand. Then put your scraps to use by adding knots, tabs or even ribbon flowers to projects and los!


2. Paper Towel Holders are another great tool I use to temporarily store the spools of ribbons that I am currently using on a project or lo.  This way they are readily accessible at my work area thru the duration of a project, then I can easily put them all away in their proper place when I've finished with them.

3. Recycled Boxes are perfect for making your own ribbon storage containers. Try using shoe boxes or photo boxes for larger spools, or plastic wrap, tinfoil, or wax paper boxes for smaller spools!  Simply paint or cover the box in your favorite paper or fabric, then measure and punch holes in the box's flap to create pull guides for your spools.  Add eyelets to the holes for reinforcement and you're all set!


4. Toilet Paper Holders can be helpful when  looking for a way to store your ribbon cards.  I simply love ribbon card spools, because they don't take up as much room and you can organize your ribbon by color or manufacturer on rings, for easy reference.  Buy hanging them on this flush mount Toilet Paper Holder, I can store them on the inside my scrap cabinet doors!  


5. Curtain Rods are an inexpensive, yet totally decorative way to store your ribbon spools so that they are visible on the walls of your scrap space.  I'd look for rods whose ends pull off to make for easier access and make sure the brackets give you enough distance from the wall for your larger spools.  Another tip: when you've finished a spool of ribbon, save the spool so that you can wind ribbon you may get from kit clubs, or that you may purchase by the yard on it and store it with the rest of your ribbon!

6. Key Holders can be useful if you're like me and like to have 12 inch lengths of ribbon available in a variety of colors for borders on your los.  Using bulldog clips I clip ribbons of the same color or theme in a bunch and then hang them from the hooks on the key holder.For me its always the challenge of out of sight...out of mind...this way I know what I have and am inspired to use it!

Now get out there and get organizing...creatively!  Can't wait to see what you all come up with!

Saturday, March 6, 2010

2009 in 9000 Words

In the month of January, I saw the 2009 Photo Recaps everywhere and told myself...I should do that!  Here we are two months later (story of my life...lol!) and thanks to the inspiration of my friend Katrina Kennedy and her Saturday Snapshot Prompt from GIS's "Get It Blogged Challenge!",  I've finally been motivated into action!  So without further ado here's my favorite pics of 2009...and you'll never believe it...but there not ALL of Caleb!


So if a picture is worth a thousand words and I can count correctly...that makes 9,000 words about 2009! (If you're not sure about the math, don't take my word for it...check out Katrina's Blog!)
 However, if the pictures aren't enough, here's a brief summary of what each of these pictures mean to me! (going from right to left, top to bottom)

1. This was Caleb's first dandelion...many more would follow, but I feel very fortunate to have been able to capture his look of wonder as he handled his first!

2. Jake and Caleb will always share a special bond, that was forged in stone this very year...

3. This year we enjoyed many days in our pool, but the days my niece and nephew joined us were always the BEST!

4. Our day trip to Joe's Valley this year with Jake's family was memorable for all!

5. Sometimes you just stare out at the world and feel honored that GOD would place his creation in your hands! 

6. Other times you wonder how GOD could trust you with something so PERFECT!

7. This picture for me embodies two very important things in my life: Family and Faith.

8. Most days Caleb is fearless and ready to take on the world...I've learned to cherish the days that he is unsure and seeks the guidance of his mommy and daddy!

9. The world is place of magic and wonder...I feel truly blessed to be a part of it!

These photos brought to you by the graces of my wonderful new Nikon P90, fabulous photography and editing teachers like Lynn Weber and Katrina Kennedy, fun photo textures and actions by Emily Powers and Coffee Shop Actions and an amazing husband who allowed me to spend all of our money on those things...lol! 

Tuesday, March 2, 2010

Good Fences Make Great Neighbors...

Its the second day of Get It Scrapped's month long Get It Blogged Challenge, and today Sharyn Tormanen has challenged us to blog about neighbors...


You know...for the longest time I never really understood this quote.  Maybe this is because most of my adult life I lived in apartments and never really had a fence.  Instead I shared 4 walls with my neighbors, sometimes I was forced to listen to their music or their fights, other times I was forced to smell their fantastic breakfasts.  One year we lived in an apartment that had the heating coils in the floor and we lived on the bottom and never had to turn our heat on because the heat from the apt above was roasting us alive!  Then my husband and I's lives began to evolve: We had animals and a child and soon we longed more and more for a fenced yard of our own!

When we moved into our first house almost two years ago, we didn't know anyone.  And at first it didn't matter because we HAD A HOUSE, WITH A YARD and A FENCE!  Then one day after we'd settled in Lynnette knocked on our door and like an idiot I made her stand on the doorstep without inviting her in while she introduced herself and her family and told us about the community we were living in.  She brought us a wonderful bread basket and welcomed us to drop by anytime.  We became very good friends with Lynnette and her husband David, and her daughter and son -in-law Amy and Bruce, who lived in their basement apartment.

Some mornings I would wake up and Bruce was clearing the snow off our driveway or David had wheeled out our garbage can.  David helped us to fix our sprinkling system and had taken the liberty of making all of the repairs to our fence.  They put up with our barking dogs, whose spot in our garage was a mere 20ft from their bedroom window.  And Amy and I had become great scrapbooking buddies! So naturally we were saddened when we saw the for sale sign in their yard last fall.  Now empty nesters they had decided that they no longer needed the space of their 6 bedroom home and were moving into something smaller.

We still see the Paganos from time to time, they visit my work regularly and Amy and Bruce are in our Ward still.  But we are sad to have them leave!  However, I think the best way to honor them, and the memories that they left us with... is to strive to be great neighbors just like they were!  So this year when my husband and I make the repairs to our fence I will think about how "Good Fences Make Good Neighbors", maybe not in the sense that this quote's author had intended, but it will remain true for me just the same!
 

Monday, March 1, 2010

Monday Makeover: Ten Quick Ways to Makeover Your Photos!

As part of Get It Scrapped's second dose of the Get It Blogged Challenge, I am introducing Makeover Mondays!!! Each Monday during the month of March, you will not only receive a new "makeover" challenge, but you will also be able to refer to my blog for some fun tutorials to help you on your way! For more info about playing along, visit the Get Blogging Forum at Get It Scrapped!  This Monday we are making over our Photos! And here are some great ways to give your photos some extra oomph!

Ten Quick Ways to "Makeover Your Photos"!

Okay...so here's the photo I started with of my little snow angel Caleb--straight out of the camera!  Wow... look at those rosy cheeks!

Now let's see look at some simple ways to give this photo a little makeover!

1. Basic Editing can go a long way!  By simply adjusting the contrast, levels, sharpness and color, you can give your photos a real leg up! I've also toned down the red in his cheeks a little and brightened the photo up a bit.


2. Color Conversion can give your photo a flawless look, while also creating great contrast and a completely different feel.  Both Black and White and Sepia are common choices...I especially love them for snow photos because I love the contrast and do you see how perfect those cherub cheeks look!


3. Actions can make a world of difference in a matter of seconds!  This one is Golden Vintage from Coffee Shop .


4. Vignettes not only draw attention to your subject and help to disguise empty or distracting backgrounds, but also bring a bit of drama to your photos.


5. Photo Textures and Overlays help to convey a certain tone in your photograph, and can be extremely useful to those of us without all of the fancy photo equipment to achieve certain effects on our own.  Check out this awesome photo texture by Emily Powers, "Sleet" from her Photology 2.0 pack.  It not only adds a wonderful texture and a playful tone, but it comes complete with built in lens flare!


6.  Selective Coloring is a great way to draw attention to a specific object in your photo or to intensify the already brilliant colors present in your photo.


7. Frames can give photos a finished look, and often help to tie them into their intended backgrounds, this one is by House of 3.


8. Text allows you to clarify your photo's message or meaning, while adding a bit of flair.


9. Sketches can give your photo a completely different look and feel.  Depending on the type of sketch you choose, they can set a tone ranging from playful to regal and they allow you to literally turn your photos into art!


10. Other Fun Photo Effects, like the "scraped windshield"  I've created below, can really take your photos to the next level, while also allowing you to have a little bit of FUN!


Give one or all of these Fun Photo Makeovers a try!  And if you're looking to learn more about Photo Editing then check out Lynn Weber's great array of Photo Editing classes, available in self-paced format, at Get It Scrapped!

Monday, December 14, 2009

I Just Know...

Not only was I inspired by Tami's challenge @ GIS...to take to our blogs this month and write about how someone shows love for us, thru actions rather than words--but I was also very inspired by her own post at her blog  Tidbits  in which she equated her husband's love to the frequent gesture of Pepsi!  So It is with that in mind that I, began writing the following post:   


It can be said with absolute certainty that I love my son more than anything in this world!  He is the most beautiful and precious thing in my life (don't worry dh you are a VERY close second!)!  In my many scrapbook los and to anyone who will listen, I have atested to my insurmountable love for this adorable little boy! My son, on the other hand, tends to shy away from any type of actions that may show that this love is reciprocated.  He hates kisses...he refuses to say "love you" and he reserves his best hugs for when daddy comes home from work! He does often give me gifts like cobwebs, ABC food and random objects he has picked up and is now finished playing with.  But I don't think these things really say LOVE! He does, however, have a sixth sense about when mommy isn't feeling well or is upset and he reserves something special for those times.  Caleb enjoys a good ba-ba when he isn;t feeling well...so it is natural that mommy would be the same...right?  So Caleb totes the 20 oz of Diet Coke I am nursing over and says "MOMMA."  Sometimes he even brings over empy cans or bottles...but always Diet Coke...because thats what momma likes in her ba-ba.  Its a small gesture I know...but thats how I just know--He Loves Me!

Monday, August 31, 2009

The Finale

For our final blog challenge for August, Michelle at GIS has prepared the following list for Make a List Monday so you can play along too! Just Copy my list and add your own answers or visit www.debbiehodge.com/gisforum for Michelle's original list.

Today I am looking out at the pergola in my backyard
Today I might cook steak and lobster...yum
Today I am reading my GIS buddies' blogs
Today my biggest priority is to get our car registered (nothing like waiting til the last minute)
Today I hope to see anywhere outside of my house
Today I hope to talk to one of my friends
Today I have already seen/talked to does my son count?!
Today I am watching HGTV...all day
Today I am dreaming that there were 48 hours in a day
Today I am wearing my pajamas...which reminds me I should go change!
Today my mood is lazy
Today I am going to go camping in my backyard with my son!

My Creative Process

I'd love to ramble on about this grand series of events that leads me to my creative destiny...but the truth of the matter is...most of my los, or projects, etc are born by simply wanting to use one single item...a photo, an embellishment...even something so simple as a font I happen to like. Then this simple inkling turns into a "full blown-hair-brained-Amy" idea (generously nicknamed by my DH). I never use the same process twice...I often wonder if I'd be a better scrapper if I did...but it's what works for me, as I'm sure over the years you've found what works for you. My creative process is ever-changing, as is my style...life's too short to make the same layout twice!


Today I had an urge to use a piece of art that my son and I completed at our local childrens museum. You know the feeling...your fridge is crawling with crayon drawings and splatter paintings...but what to do with them to make room for the next batch...do I throw them out? Never.... I couldn't even think of it...so we store them...where...oh here and there. Well I've got an idea that will help you put these to good use. Use them as patterned paper in your los, of course! Crayon drawings and splatter paintings work for any number of themes (i.e. school, kids, art journal, etc).

Sour Photos...Make Lemonade

Thats what Sherry Stevenson is preaching in her upcoming September class at Get It Scrapped and in the final installment of Thought Provoking Thurdays. Her challenge to us was to take our sour photos and scrap them. She even included this very helpful hint: Use your sour photos to support the story, while using a fantastic photo to steal the show!

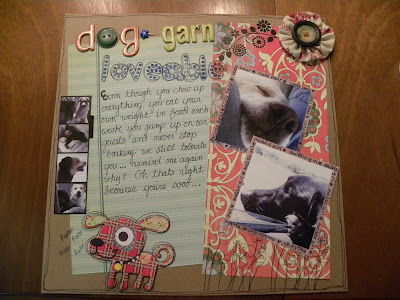
Thats what I've tried to do here in My Dog-Garn Loveable lo. We have managed to capture quite a few breathtaking photos of our two loyal friends Coda and Maddie...but we've also taken our fair share of duds...particularly every photo of the two of them together! So in this layout I've chosen my two favorite pictures of my dogs to stand front and center, but have added a small photo strip off to the side to show them growing up together over the past few years.


Most of the photos in the strip are low quality cell phone pictures...but this fact isn't quite as obvious because of Sherry's great tip...can't wait to see what else she has in store for us...I've got plenty of lemons!

Saturday, August 29, 2009

HB2U(Happy Birthday to You!)

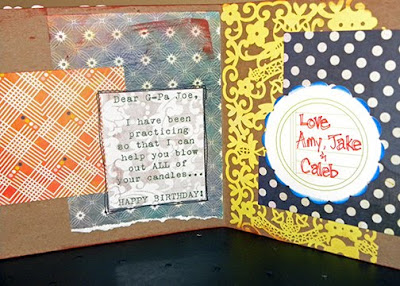
So I'm not much of a card maker...but Sharyn's challenge for Wacky Wednesday was to make a card using a photo...so I took a crack at it. I never buy serious cards...so it goes to figure that I would never make one either...so I chose this funny photo of my son making blowfish faces because it reminded me of what we look like when we blow out candles. This card is for Caleb's g-pa Joe, written from his perspective...but from all of us!


HAPPY BIRTHDAY GRANDPA JOE!!!!

Photo Scavenger

The August Blog Challenge at Get It Scrapped is winding down with just three more challenges left...so today Katrina has brought back an oldie, but a goodie...for what better way to exit than the way you came in right!? Here are my photos for todays challenge...

Something RED


FOUR of Something


Something SWEET

Monday, August 24, 2009

Get 'er Done!

Title Page from Jessica Sprague's Beautiful Evidence:20 Pages in 20 Days Album

Its another Make a List Monday and here's my to-do list for the day, how does yours measure up...have you got a full day planned or do you have plans with your TV remote and a bag of chips (I'm Jealous!)
  • HOMEWORK
Play with Scrap this Kit [:( It didn't come]Work on Scraps Album
Art Journal Page
GIS Art Journaling 101 -Lesson 2
Jessica Spague's Beautiful Evidence-Day One
  • CLEANING
Clean Basement
Clean Scrap Room
Take out Garbage
Clean Kitchen
  • FUN
Take Photos of Caleb
Date Night with DH

Sunday, August 23, 2009

Speaking of Scraps...

On this Scrap Sunday, Tania Willis is challenging the members at GIS to take to their blogs and write about 1) a scrap project in the works; 2) how we organize our scraps; or 3) where we scrap. I can't wait to see what everyone is working, their scrappy spaces and get a whole bunch of great new tips on organizing my scraps! But in the meantime I'd like to share my contribution to Scrap Sunday with all of you.

I recently received a free 8x8 Shutterfly album, from the Designer Digitals DigiCrop in SLC, so I'm working on 20 custom digital pages for this album that I have entitled "Scraps of My Life". This is my cover and I hope to fill the rest of the book with some of the layouts that manifest from Jessica Sprague's Beautiful Evidence :20 pages in 20 days online event.

Needless to say I will be busy over the next three weeks, finishing up my archived classes from GIS (ie art journaling, photo editing, handmade embellishments), taking my new class at the Sraground and playing with my kit on its way from Scrap This Kit, not to mention getting ready for Get It Scrapped's fall line of classes! Ready... set...SCRAP!

Saturday, August 22, 2009

PICTURE Perfect


You know...Katrina...I think that Robert Capa fellow may have been on to something, when he said "if your pictures aren't good enough then your not close enough." Because ever since I've taken Katrina's class (she is a big fan of "filling the frame" with your subject!)at GIS, I've seen my photos improve immensely! Sometimes just getting a little closer than you normally would or deciding that you don't have to get every inch of the subject into the frame can make all of the difference in the world. Perhaps thats the biggest thing I've learned from Katrina is deciding what needs to be in the picture and what doesn't...I believe this is called composition. Before Thru the Lens and Katrina's help with the Saturday snapshots I was just going thru life snapping away...making sure only to capture the moment, never thinking of HOW I wanted to capture the moment. But now I've got my eyes open (and glued to my camera lens) in hopes of not happening upon, but CREATING those perfect shots...like this one. Here my niece is sitting on the beach at Joe's Valley, looking out at her daddy doing tricks on the jetski!

So I'd like to take this weeks Snapshot Saturday as an opportunity to thank Katrina...not only for participating in this month's blog challenge, but also for inspiring me to give more to my photos..thru her lessons, and her art. I can't give all the thanks to Katrina on this particular photo though (though I could not have created this shot without her), as I must also thank Miss Lynn Weber for contributing her infinite knowledge of photo editing as well...together these ladies led me to a feeling of satisfaction with my photos that I had not yet known! Thanks Gals!

Friday, August 21, 2009

10 Random Things...

In an effort to get to know each other a little better all of us at GIS are sharing a little too much about ourselves...but its all in good fun...won't you join too?! For this week's Finding Fun Friday, list 10 random things about yourself, share as much or as little as you like! Now get to know me a little better by reading 10 Random things about Amy:

1. I love the smell of scotch tape (it has the exact same smell as the clear gummy bears...yum)

2. I used to strain my salsa...because I don;t like the texture of tomatoes.

3. I love watching the Wizards of Waverly Place and have convinced myself that I'm watching the Disney channel for my 18 mo old son.

4. I wear sandals in the snow and to go hiking...sometimes because I forget, but mostly because I just love wearing them!

5. I have an unhealthy obsession with the color green...and I have apparently imprinted this obsession on my son who will now only eat the green apple jacks and leaves the red ones behind.

6. I love the smell of rain...but I especially love the smell of Central Utah rain, the sage and rain mix to make this wonderful aroma that smells like spearmint gum!

7. I watch the movie Twilight once a week, only because I've read the books 3 times over...and their starting to show quite a bit of wear.

8. I often dream about scrapbooking.

9. I have a "smell bad phobia" I constantly worry about smelling bad, and apply deodorant 4-6 times daily...usually by the end of the day I have what my dh calls "under arm-or" in other words an impenetrable layer of deodorant. I'm always asking people if I smell bad...and in my experience people are rarely truthful about this!

10. I love the Rolling Stones...no explanation needed!

Thursday, August 20, 2009

Ms. Alexys, Both Witty and Wise!

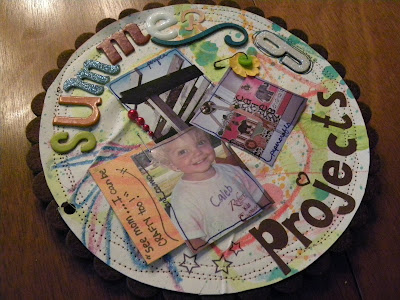
My niece Lexy is a wealth of wisdom and wit(or brutal honesty as I like to call it)! She never fails to leave us all amused with her bold comments, unless of course we are the target of her unintended scrutiny! Luckily I have only felt the sting of her truthfulness once, but I am able to look back on it with laughter! She came into the bathroom one day while I was doing my hair and told me my hair looked pretty...sweet right, so I of course said thank you...then she struck...by asking"why is your bum soooo big?" A little stunned I replied by sidestepping the question, "well it got bigger after I had my son," but she called me on my excuse by saying, "well my mom has had two kids and her bums not that big...." Yeah, I had nothing...I wanted to go to my room and cry, but instead I decided to treat her with the maturity that she..well...did not display, by saying, "well I guess I must have ate a little more than your mommy did...huh?" And at that she said "oh, that's ok I like to eat a lot too!" Ouch right...well it could have been worse, but needless to say I started exercising and dieting the next day! Some other Lexy favorites are:


I don't want the fat doll!

Maybe he has to fart?

Grandma, you're really old!
Your house is messy!
How come you only have boring baby toys?
You use the computer alot...do you have webkinz too?

And of course...the infamous "ewwwh", when discussing, aything to do with kissing, underwear/diapers, or watching out for dog poo.

Lexy says the darnedest things...but we love you girl...so I say...keep on keepin' it real!

Wednesday, August 19, 2009

Oh The Places I Go...

For the August Blog Challenge, the ladies at GIS want to know what your favorite places to go online are? Here are a list of my top ten most visited sites online...haven't heard of some of these?...maybe you should check them out!

1.Get It Scrapped

2.
Facebook

3.
Scrap This Kit

4.
Chase Online Banking

5.
The Spraground

6.
Designer Digitals

7.
Scrap Artist

8.
Creating Keepsakes Magazine

9.
Adobe Photoshop Online

10.
Etsy

Related Posts Plugin for WordPress, Blogger...