Monday, January 31, 2011

The Monday Makeover Is Back!

Some of you may remember my Monday Makeover posts from March of 2010, during the Get It Blogged Challenge!  Well they're back!  I enjoyed coming up these mini makeover ideas so much that I've decided to make them a permanent resident here at Scrappydoo...starting today!

Monday Makeover: Personalizing Your Posts by Adding Your Own Custom Signature

Today we're going to look at how you can give your blog a facelift by adding your own custom signature to the bottom of each of your posts, by following the simple steps below:


1. Design your own custom signature using Photoshop or your choice of imaging software and save your image as a PNG file.  This will preserve your transparent background in case you are working with a blog whose background cover is NOT white, as well as preventing you from having to go back and change things if you decide to change your background color in the future.

2. Upload your signature image to your Picasa or Photobucket account and grab the direct link for future use.


3. Access your blog and click the "Design" tab in the Blogger options bar. Then click on "Edit HTML" and make sure the "Expand Widget Templates" box is checked.

4. Locate the following line of code in your template's code:

<div class='post-footer-line post-footer-line-1'>

5. Then directly below that paste the following portion of code:

<img src='INSERT YOUR URL HERE' style='border: none; background: transparent;' />


6. Finally, preview your changes to make sure everything looks the way you want.  Then click the "Save Template" button to commit these changes. And now you've signed each of your posts with your very own custom signature!

You can look forward to mini makeovers just like this one every other Monday, where I'll share ideas to help you makeover your pages and supplies, your blog, your home and yes...even yourself! I'd love for you to take a peek at my past Monday Makeover posts and this week you can have a double dose of makeover madness and check out my article featured today on the Get It Scrapped! blog to find out more about making over your old and out-dated jewelry!

Friday, January 28, 2011

Friday's Five: Creative Ways to Use Your Multi-Purpose Punching Tools on Your Pages!

Whether you're using a heavy-duty multipurpose punching tool like the Crop-A-Dile, or your basic Punch & Setter Kit, like that offered by Making Memories (or anything in between), here are a few ideas to help you "PUNCH" up your pages:


#1 Lace It Up!
Using your multipurpose punching tools can help you to create fun borders and accents by allowing you to weave a little bit of ribbon around your edges or along an accent border.  By just punching a series of evenly spaced holes, and threading a length of ribbon in and out, you can bring a bit of charm to your pages.  In my layout, "Grow" I've created a cute little border accent by which I've secured my journaling onto my layout, using this exact technique.


#2 Dress It Up!
As a cute corner accent, or as punctuation, or even as a little bit of background texture, eyelets can really dress up your pages.  They offer a way to bring color, interest, texture and function to your layouts, depending on how they're used.  And your multi-purpose punch tools allow you the power to place these little beauties wherever you like! In "2010" I used eyelets both as punctuation to divide up my title and as a small accent by clustering them in the corner of my page.   


#3 Punch It Up!
Your multi-purpose punch tool can also help you to bring contrast and dimension to your layouts by giving you the ability to break up your whitespace, with the contrast of the negative space created by punching.  You could try creating a fun random pattern or following a specific line, as I've done above in my lo "Oh Boy".


#4 Tie It Up!
The best way to create a knot or a bow in the middle of your page is with your multi-purpose punch tools.  Not only does it help to have a punch that can reach anywhere, but using a punch can also give your bow a more realistic look and a sense of purpose, by securing to the page.  It eliminates the feeling of  a floating element and to really top off the look you could add eyelets for a bit if style.  In "My Pregnancy Timeline" I used my multi-purpose punch to secure my knot in the center of the page.    


#5 Hang It Up!
I like to use my multi-purpose punch as a way of hanging things like banners, beads, titles, photos and more along my pages.  I do so by setting two eyelets in my page: one at the beginning of my line and the other at the end.  I then take my jute, twine, or whatever other fiber I've chosen to hang my elements from and thread the raw ends through the eyelet holes and tape them off on the back.  Now I have a secure line to hang my elements from and the eyelets give it a nice finished look. In "Is It Spring Yet?", this is the technique I used to string my floral banner across the page. 

Wednesday, January 26, 2011

Inspired By...Donna Downey

Photo Source: Donna Downey  
So when I first saw this adorable ruffled messenger bag made by Donna Downey, my first thought was...I have to make one of those!  But then I thought of the current state of my "over-sized mommy purse" --large enough to house wipies and snacks and with crayons and hot wheels floating along the bottom--and I realized this may not exactly be the time in my life to try to be stylish!

So instead I took that overwhelming feeling of inspiration that this beautiful bag filled me with and translated it into the following layout: 


I was so pleased to be able to capture all of the things I loved most about this stylin' bag: from its bold prints---> to the variation on its funky color scheme---> to those yummy ruffles!  I was also able to cure that "boring mom feeling" that came from my depressing realization that this bag was not practical for someone like me, by using this layout to remind myself of how blessed we truly are to be parents again!

If you'd like to see how to make your own Donna Downey Inspired Messenger Bag, check out this mini how-to on Donna's blog Simply Me! Thanks for the inspiration Donna!  If you'd like to learn more about translating inspiration from all around you into your scrapbook pages,  then join the team at Masterful Scrapbook Design for the month of March, where they will spend the entire month exploring the in and outs of INSPIRATION!

Monday, January 24, 2011

New 52: Week 4: Paper Swirl Flowers

For this week's New52 I decided to learn to make those adorable paper swirled flowers that up until now I've only used on digital layouts! For the longest time I have been looking at these beautiful handmade flowers on paper layouts and projects and thinking..."they look simple enough!" However I have yet to try making them. So this week I decided to finally give it a try!

My first few attempts on my own were fairly unsuccessful....but before giving up I decided to turn to YouTube for some guided instruction and found the following video to be very helpful!


If you have been wanting to learn to make these adorable flowers to add to all of your papercrafting projects I say go for it! After a little bit of practice they will be a piece of cake and you'll be adorning all of your pages with these little beauties!

Friday, January 21, 2011

Friday Faves: These are Definitely on My Digi Wishlist!


Wednesday, January 19, 2011

New 52: Week 3

Okay...so I'm a little behind (on more counts than one), but thats okay...better late than never right?!  After careful consideration (and a much needed kick in the rear from my "Creating Daily" prompt for today) I've decided that my NEW52 Project for the week should be to get started with my very first creative journal.

I've always loved the idea of keeping a journal and am in total awe of those who manage to keep up with them--however this is something I've struggled with for the past 28 years!  So this year I'm forcing myself to keep a journal...


I'm warning you now that I probably won't write in it every day!  Some days I may have time to practice my art journaling in it and other days maybe only time for a list of things that inspire me or a thought or two--the important part is that I keep one.  One day I hope to look back on it and watch myself evolve into the woman that I am slowly becoming over the years.

Monday, January 17, 2011

Your 2011 Goals: Scrapbooked!

Every year around this time, we find ourselves making resolutions, setting goals and exploring changes to better our everyday lives.   Upon researching the Top Ten New Year's Resolutions made each year, I noted that many of the goals below, seemed to always make the list.  And believe it or not, you can incorporate your beloved hobby of scrapbooking into helping you to achieve each and everyone of them.


Allow me to share some examples of how you can reach your goals and have fun scrapping too!


Make Healthier Choices


Eating better and exercising more are both noble goals, that can lead you to an overall healthier lifestyle.  So why not use your papercrafting skills to make your very own Diet and Exercise Journal, to track your efforts and progress!  I made the diet and exercise journal pictured to your left using a hybrid template by Biograffiti.  This template made my journal super easy to design and customize, but you could just as easily design your own, using your favorite paper or digital supplies.  And the best thing about making your own Diet and Exercise Journal...it gets you excited to get going on the work that lies ahead.

Try Something New

Whether it be taking a class to learn a new skill, or trying out a daring new style--giving something new a try can have a very positive effect on your new year. Assuming that "your something new" has nothing to do with your crafting, then at the very least you'll have new memories and experiences to adorn your scrapbook pages with. But if you decide to explore a new scrapbooking technique or style--or even a new craft all together--you'd be surprised how it can jump start your creative mojo.  This year I'll be participating in Peppermint Granberg's New52 Challenge to help motivate me to try new things more often--as well as, taking a couple of classes from Karen Grunberg focused on exploring and embracing my own personal scrapbook style. Up until now I've always focused on learning new techniques and exploring different styles, so this will be an exciting change for me!   

More Family Time

Spending quality time with my family has always been very important to me.  I used to think that my crafting cut into this time, but after looking at all of the wonderful crafts I've created for my family to enjoy, I have since realized that my paper crafting helps me to carry out this goal.

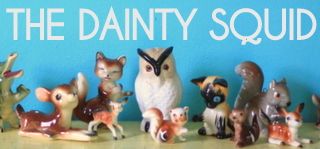
Like the handcrafted magnet board pictured above featuring all of my sons favorite animals, or the hours spent just looking at scrapbook pages with my son, your scrapbooking can also translate to fabulous family moments.

Get Organized

Organizing can be a very overwhelming task--one that never really seems to end.  Just like scrapbooking, there is a process to it, that differs for each person.   Bringing a bit of your own personal style into your organizing  could not only make the experience a less daunting, but it might also inspire you to better maintain the end result.  And using your scrapbooking talents may be the perfect way to achieve this goal in style!  Whether you decide to use your digi skills to make some fun labels or you use your leftover scrapbook supplies to dress up some of your storage containers--adding a bit of personal flair can help infuse a bit of fun into the project, while making the end result that much more amazing!

Make More Time For You

When was the last time you put yourself first?  With families and jobs and commitments and aspirations--who has the time, right?!  However, many of us still make it a goal each year, to create more time for ourselves.  Now wouldn't it be great if as scrapbookers, we could "make" extra time for ourselves?  Unfortunately, I haven't found the secret to creating more time with my glue runner or paper trimmer--but I would encourage you to use these tools to create both opportunities and reminders to make more time for yourself.
Now that could mean creating a mini album with a few tools to help you to relax and focus on you--or that could mean simply scheduling your time to scrapbook or do as you please into your day--rather then relying on the occasional free moment.


Give Yourself a Makeover

Giving ourselves a makeover is one of the easiest and most common ways we aim to improve ourselves each year.  For some reason we've convinced ourselves that the right haircut could change our lives.  While this often isn't the case, sometimes changing something this simple can improve the way we feel about ourselves and put us in the right frame of mind to channel our renewed energy towards our other goals.
While I wouldn't recommend using your decorative scissors to give your hair a trim...there are countless ways that your craftiness can contribute to giving yourself the makeover you desire.  Whether you want to makeover your craft room, or your blog, your wardrobe or even your style...your scrapbook savvy can surely contribute!


Start a Journal

Keeping a journal can be beneficial in a number of different ways.  Some of us may find it therapeutic, others use it as a way to keep a personal record, and still others use it as a method of keeping track of ideas and thoughts.  However you benefit from your goal to keep a journal, your craftiness can both contribute to you efforts, as well as benefit from them. You can use your scrapbook skills to design your own journals or to add a bit of character to their pages.  And then when it comes time to tell your stories on your scrapbook pages, you'll have your thoughts and stories at your hand.


Good Luck with your 2011 goals and hopefully your crafting skills can not only help you to become more excited about reaching your goals, but also help you to carry them out!

Friday, January 14, 2011

T.G.I.F

On this Friday I'm thankful for many things. But most of all I'm thankful for the newest addition to our family...Jasper!


  • I'm thankful that he is a good eater and is therefore gaining weight and healthy.
  • I'm thankful that he is sleeping longer hours through the night.
  • I'm thankful that Caleb is taking to his new little brother so well.
  • And mostly I am thankful that he is finally here!

Friday, January 7, 2011

Friday Faves: 10 Favorite Layouts of 2010

Take a look at a few of my favorite layouts from 2010.  Some digital, some paper--all very special to me for different reasons.  If you can believe it, choosing just ten was the hard part!


Wednesday, January 5, 2011

Goals for 2011: Creating Daily

Do you ever find that no matter what you are doing, you seem to go about it in spurts?  You get super engaged in an activity, task or hobby and then life happens and then its days even weeks before you revisit this task or activity again....

I LOVE creating.  It makes me feel happy and gives me a sense of accomplishment when a project is finished and I can stand back and glance at it or snap photos of it and share it with all of you!  But like most things over the last year I found myself going about crafting in spurts.  I have decided that to truly benefit from the feeling I get from creating, that I must make it more of a constant in my life.  So this year I've made it a goal to create something everyday...and to help me on my journey I've chosen the following companion:


"There is something elemental shared among artists and crafters, regardless of chosen medium: creative energy. Crafters dabble, collaborate, muse, and make, all in their own way and on their own timeline. For all crafts, there are established techniques to follow but wild, innumerable ways to experiment, using the basics to launch crafters to new heights. Crafter’s Devotional can aid that launch. Each day of the year is given its own focus, on which the reader will find a daily dose of craft content that inspires, instructs, and illuminates." 


This book offers focused daily prompts for each weekday ranging in topic from journaling, materials, recycling, personal history and even non-craft inspiration.  Then on the weekend the book challenges the reader to unleash their creative energy further by offering a prompt that requires a bit more exploration.  This may include something like observing their environment, collaborating with others, learning something new and even gathering knowledge and/or supplies.

With this book in my hand and an inspired outlook on the next year, I'm very excited to start along my creative journey! And if any of you out there are also working from this book I'd love to see what you're up to! I will of course be sharing my creations with you from time to time and discussing some of my favorite prompts from this book!  So without further ado...let's begin "Creating Daily!"  

Monday, January 3, 2011

Note To Self...It Only Gets Better!

Leading up to the birth of my second son Jasper Jameson on Dec. 26th, I was very inspired to go back and scrapbook some of the photos of my first son Caleb and his birth.  It was so great to look back on those photos and remember that very special moment--reminding me all the time that another very special moment was just around the corner!


Above is one of my favorites of those such layouts--in which I reflected back on the birth of my first son. I now realize that at that exact moment there was no way that I could have known that this was merely the beginning of the joy I would experience as a mother--and aimed to capture that sentiment in this layout!


And as proof that it truly does only get better...this time around we were able to capture matching mother and baby smiles! 
  
Related Posts Plugin for WordPress, Blogger...